The Retroflag GPi CASE 2W transforms a Raspberry Pi Zero, Zero W, or Zero 2W into a nostalgic handheld gaming console. With its 3-inch IPS LCD screen, built-in rechargeable battery, and familiar Game Boy-inspired design, it’s a dream device for retro gaming enthusiasts . However, choosing the right operating system can make or break your experience. This guide compares Recalbox and RetroPie for the GPi CASE 2W and walks you through the simplest installation method.
As an Amazon Associate, I earn from qualifying purchases #commissionsearned ► RETROFLAG GPi Case 2w: Link (Amazon)
► Raspberry Pi Zero 2W Accessories: Link (Amazon)
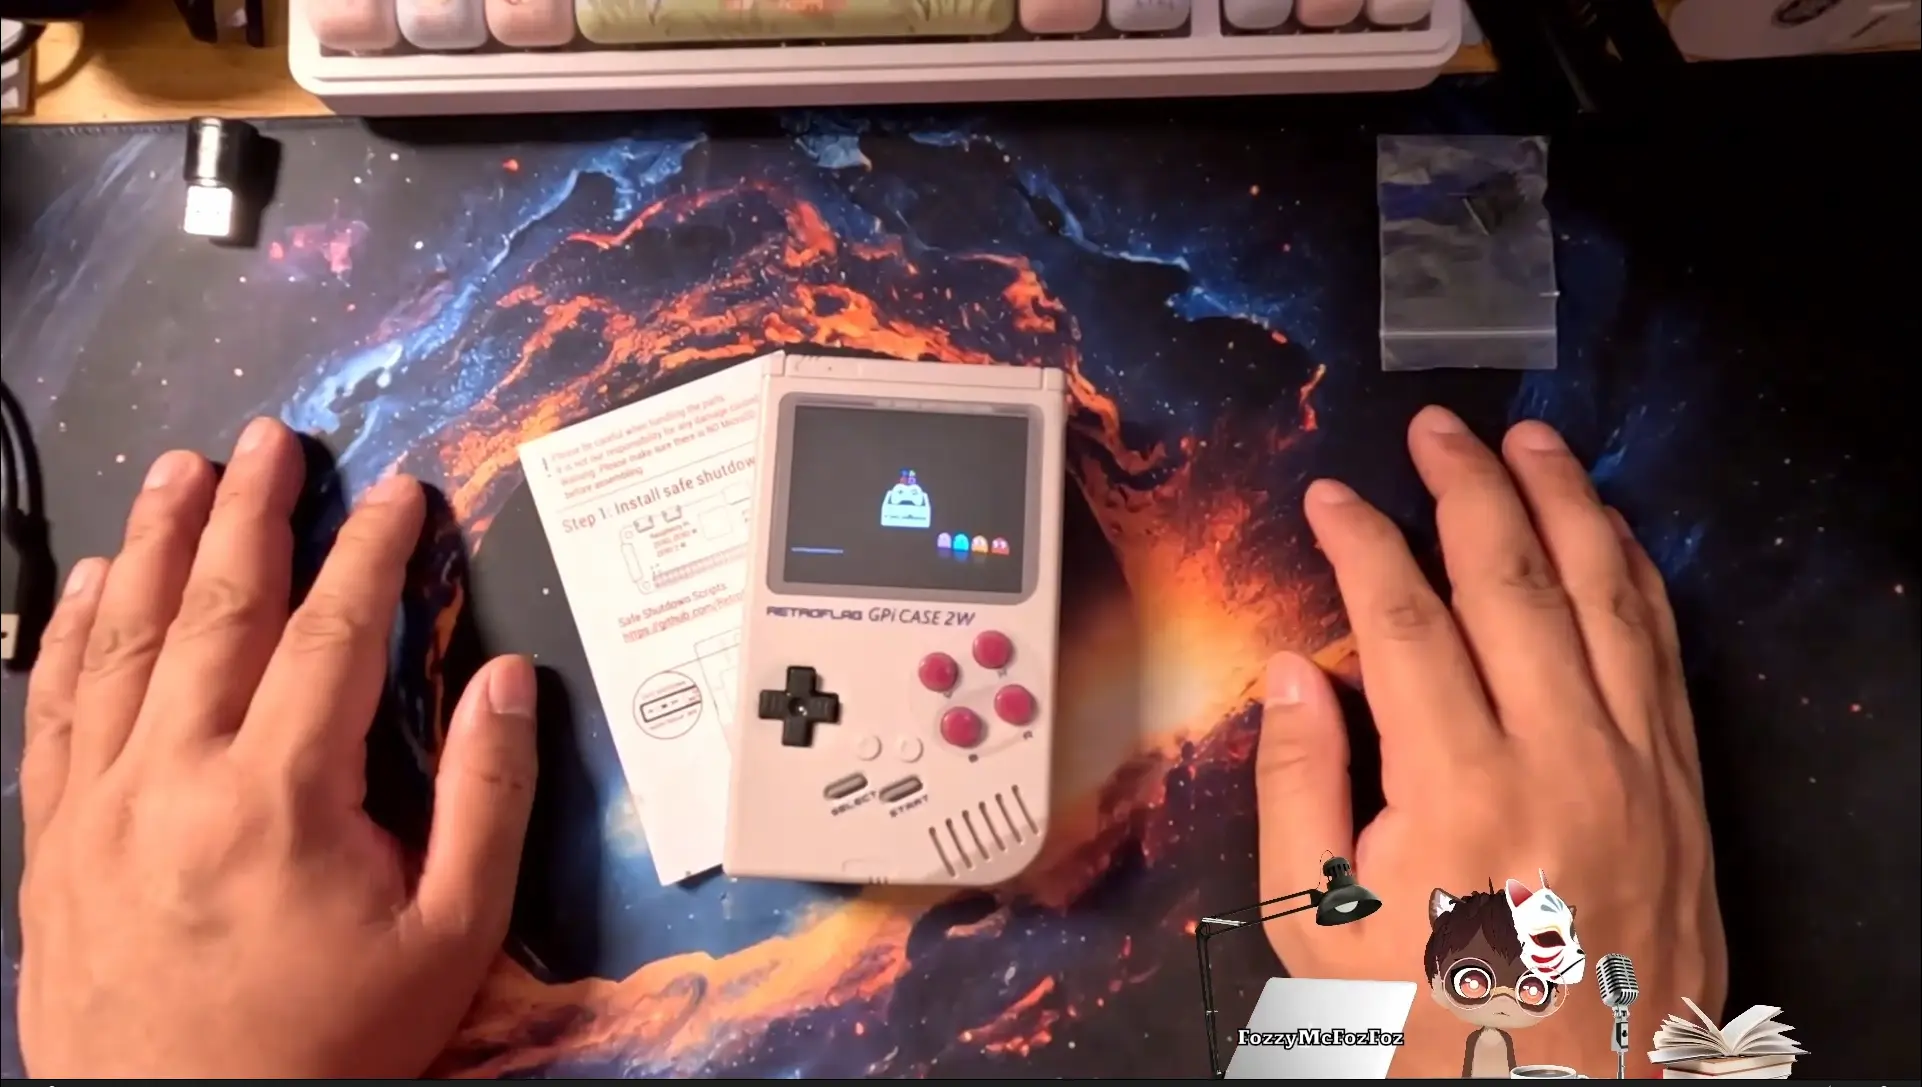
The Hardware: Retroflag GPi CASE 2W Overview
Before diving into software, let’s appreciate what this case offers. The RetroFlag GPi CASE 2W features a larger 640×480 IPS LCD screen for crisp visuals, a 2800mAh rechargeable battery providing up to 10 hours of playtime, and an extra Turbo button plus hotkey for enhanced gameplay . Installation requires no screwdriver—it uses POGO pins for a solder-less, simple setup. Simply insert your Raspberry Pi Zero into the removable cartridge back, and you’re ready .
The Great Debate: Recalbox vs. RetroPie
Both operating systems are excellent, but they serve different needs .
Recalbox is designed for simplicity. It includes built-in support for the GPi CASE 2W’s screen, controls, and safe shutdown functionality right out of the box. You flash the image, insert the SD card, and boot up—no additional configuration required . This makes it ideal for beginners or anyone who wants to start gaming immediately.
RetroPie, (currently not fully compatible, no sound after patch) while incredibly powerful and customizable, requires extra steps. To work correctly with the GPi CASE 2W, you must download and apply a separate patch for the display and install a safe shutdown script . For advanced users who love tinkering, this flexibility is a feature. For everyone else, it’s a barrier.
Step 1: Preparing Your microSD Card with Recalbox
The installation process is refreshingly straightforward :
- Download and install Raspberry Pi Imager from the official Raspberry Pi website.
- Insert your microSD card (32GB or larger recommended) into your computer
- Launch Raspberry Pi Imager: Choose Device Raspberry Pi Zero 2W
- Click OS and navigate to Emulation and game OS
- Select Recalbox (Recommended)
- For the GPi CASE 2W, choose Recalbox Raspberry Pi Zero 2 GPiCase 2W
- Click Choose Storage and select your microSD card.
- Click Write and wait for the process to complete. Raspberry Pi Imager automatically downloads and flashes the latest Recalbox image.
Step 2: Assembling the GPi CASE 2W
Once your SD card is ready, it’s time to assemble the hardware :
- Ensure the GPi CASE is powered off.
- Remove the cartridge-style back cover.
- Insert your Raspberry Pi Zero 2W into the cartridge, ensuring the ports align with the openings.
- Insert the prepared microSD card into the slot on the Raspberry Pi.
- Replace the cartridge into the main case until it clicks.
- Connect the USB power cable or ensure your batteries are charged, then flip the power switch on top.
Step 3: First Boot and Controller Configuration
On first boot of Retroflag, Recalbox will take a few minutes to configure itself. You’ll then see the EmulationStation interface .
The system will automatically detect the GPi CASE’s built-in controls
If you’re prompted to configure them (retropie):
- Follow the on-screen instructions, pressing each button as requested: D-pad directions, A/B/X/Y, Start, Select, L, and R (the shoulder buttons).
- If a button doesn’t exist (some configurations ask for more buttons than the GPi has), simply hold any key to skip .
- Once complete, your controls are ready to use.
Step 4: Adding Games to Recalbox
Recalbox offers multiple ways to transfer your legally owned game ROMs :
Via SAMBA Network Sharing:
- Ensure your GPi CASE is connected to Wi-Fi (configure in the Recalbox menu).
- On your computer, open File Explorer and type:
\\recalbox\share\roms - Drag and drop your ROM files into the corresponding console folders (e.g., NES, SNES, Genesis).
Via Web Manager:
- Open a web browser and navigate to
http://recalbox.local - Use the web interface to upload games directly.
Micro SD card:
- Manually connect Micro SD Card to Computer
- Upload games directly into the corresponding console folders (e.g., NES, SNES, Genesis).
Optimizing Performance and Battery Life
To get the most from your GPi CASE 2W, consider these tips :
- Disable Rewind: Some GBA or SNES games may experience slowdowns. Disabling the “Rewind” feature in advanced emulator settings improves fluidity.
- Battery Management: Actual gameplay time ranges from 2-3 hours depending on processor load, though the 2800mAh battery can last up to 10 hours with lighter use .
- Scraping Game Art: Use the built-in scraper to download box art and game information. For best performance, limit image sizes to prevent interface lag.
Troubleshooting Common Issues
]Based on user feedback, here are solutions to frequent problems :
- No Display on Boot: Verify the microSD card is fully inserted and the Raspberry Pi is properly seated in the cartridge.
- Wi-Fi Connection Issues: Some users report needing to set their Wi-Fi country in raspi-config. If using RetroPie, the hidden options panel in Raspberry Pi Imager (Shift+Ctrl+X) can pre-configure Wi-Fi before first boot .
- No Sound: Recalbox handles audio automatically. If using RetroPie, you may need to add
dtoverlay=audremap,pins_18_19,enable_jack=onto config.txt . (Currently No Audio Fix with Current Retropie OS)
Final Verdict: Which OS Should You Choose?
For most users, especially those new to Raspberry Pi retro gaming, Recalbox is the clear winner for the GPi CASE 2W . Its out-of-the-box compatibility means no patching, no scripts, and no frustration. You flash, assemble, and play.
RetroPie (currently not fully compatible with GPiCase 2W) remains an excellent choice for power users who want deep customization and already have experience with its setup requirements. However, if your goal is to start playing classic games as quickly as possible, Recalbox delivers a plug-and-play experience that simply works.
As an Amazon Associate, I earn from qualifying purchases #commissionsearned ► RETROFLAG GPi Case 2w: Link (Amazon)
► Raspberry Pi Zero 2W Accessories: Link (Amazon)
Leave a Reply